
Some of the links below are affiliate links. This means that, at zero cost to you, I will earn an affiliate commission if you click through the link and finalize a purchase.
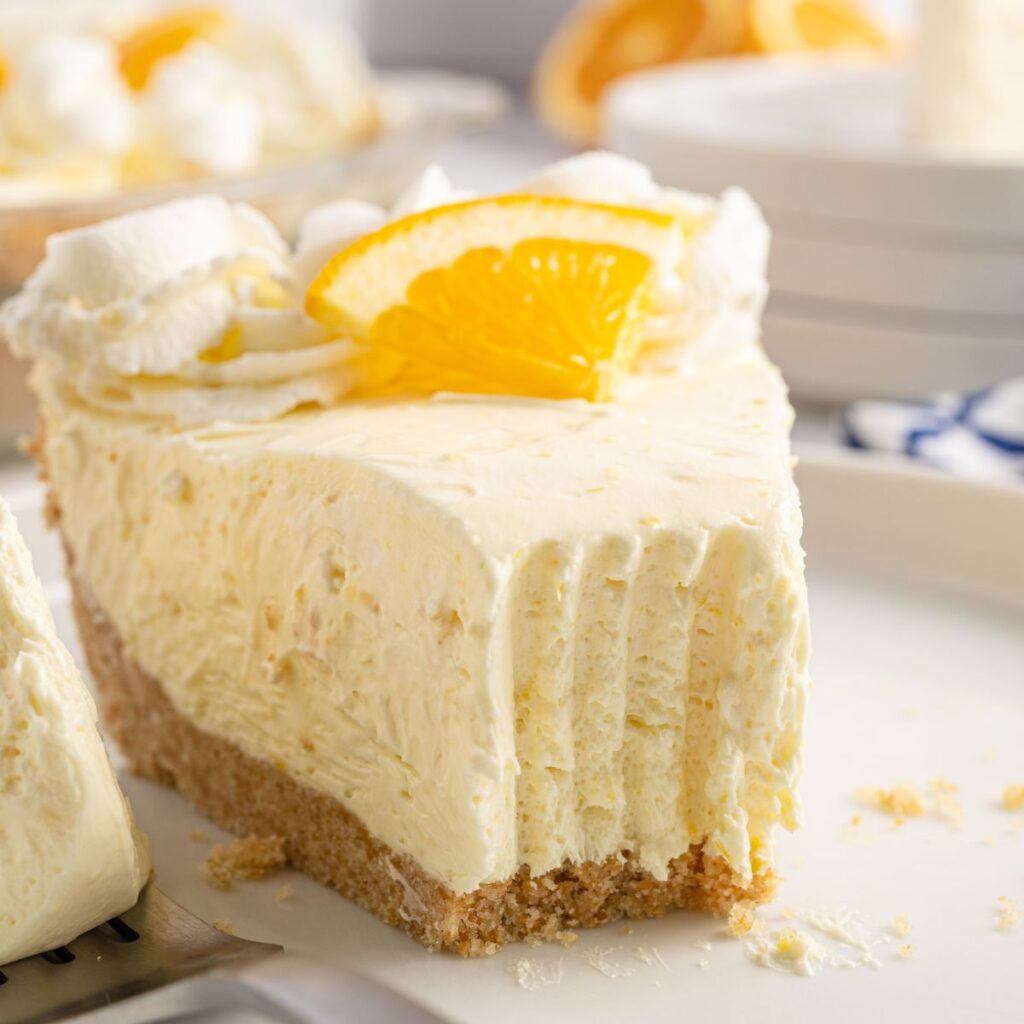
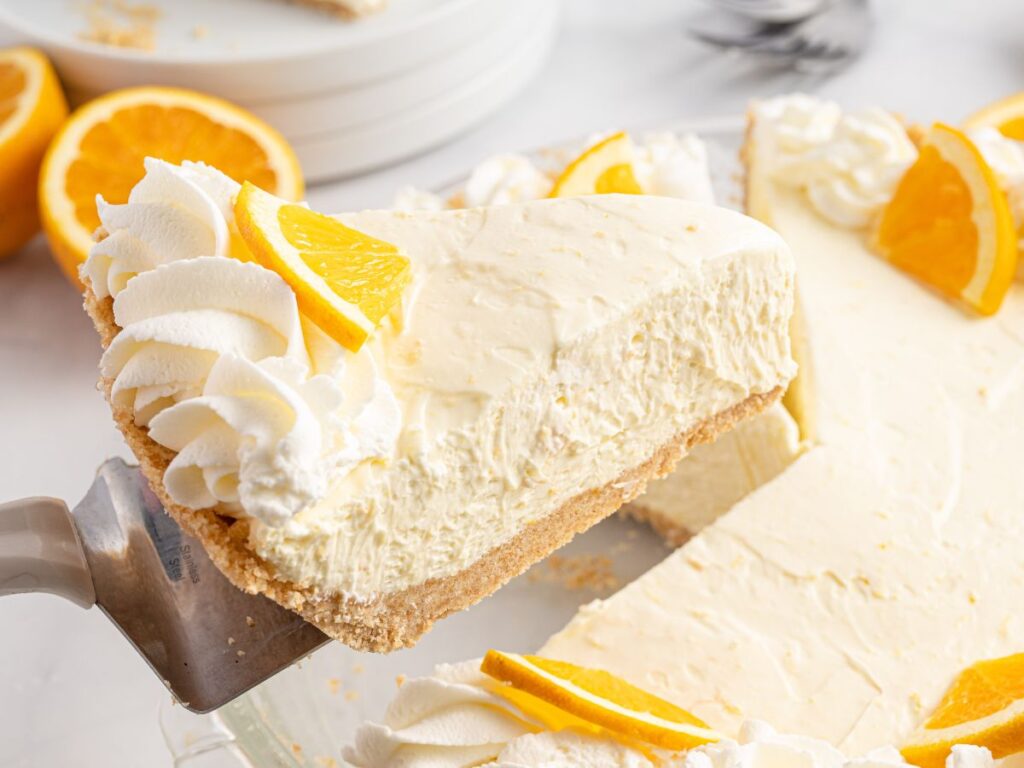
Learn how to make a refreshing, no bake Orange Creamsicle Pie in your own kitchen. Simple to make with a homemade vanilla wafer crust, a creamy orange cheesecake filling, and topped with whipped cream and orange slices. You don’t even have to turn on your oven for this one!
No Bake Orange Creamsicle Pie Recipe
No bake pies are such a popular summertime dessert! No need to turn on the oven and you’ll fall in love with the creamy, light, and fluffy texture of this orange creamsicle pie.
Simple to make with a fairly easy prep, even with the homemade graham cracker crust, it won’t take long to whip this pie up and then you let the fridge work its magic. Refrigeration is vital for this no bake pie because it brings all the flavors together and the pie has time to thicken and set.
Why You’ll Love This No Bake Dessert
- It’s No Bake! : Especially during the hot summer months, it’s always nice to make a delicious dessert for your family and friends that requires no oven.
- Simple Prep : Even with the homemade vanilla wafer crust, this pie is so simple to make. Whip up a quick no bake orange creamsicle cheesecake mixture and fill the pie. That’s it.
- Fresh & Bright Flavor : This pie is bursting with fresh and bright citrus flavor thanks to the freshly squeezed orange juice and orange zest.
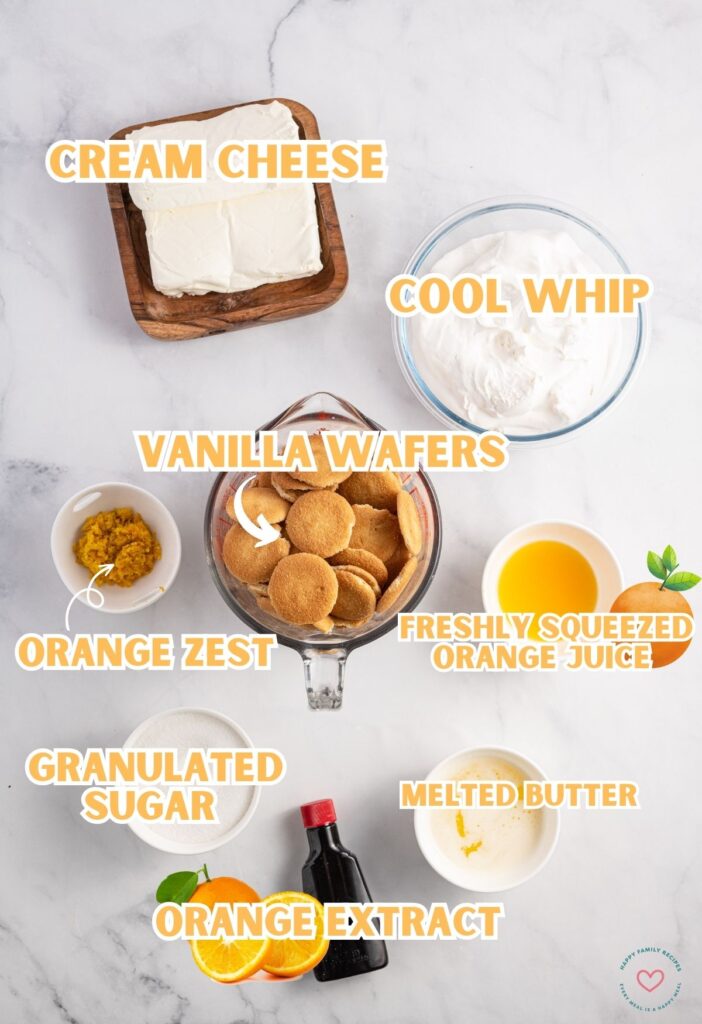
Ingredients Needed
- Nilla Wafer Cookies – Any vanilla wafer type cookie can be used. Store brand or Nilla Wafers both work great.
- Melted Butter – This is what binds the crust together.
- Fresh Orange Zest
- Granulated Sugar
- Cream Cheese – For the best flavor and creamy taste, I highly recommend using full-fat cream cheese along with the name brand (Philadelphia). It’s one of the only things I insist has to be name brand when using in recipes. Makes such a difference!
- Freshly Squeezed Orange Juice – You need to zest an orange anyways, so go ahead and get that fresh juice out of it also. I don’t recommend using orange juice from a carton.
- Orange Extract – This is easily found by the other extracts like vanilla, almond, etc.
- Cool Whip
If you can’t find orange extract use an additional 1 tablespoon of fresh orange zest 🍊
I don’t recommend using bottled or concentrated orange juice (from a carton) because it has a lot of added sugar. Oranges are available year-round and only take a minute to juice. To get the most juice out of the orange, roll the orange firmly back-and-forth on the counter to “loosen’ the juices.
How to Make Orange Creamsicle Pie
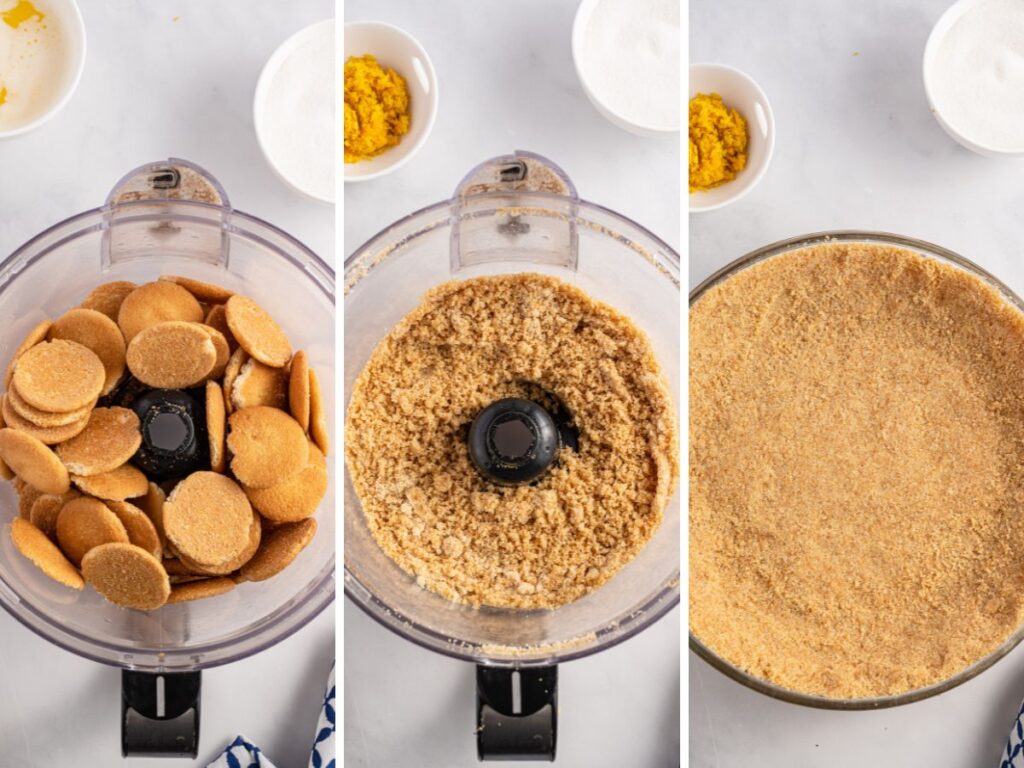
- Start by making the crust. Grease a 9-inch pie plate with shortening or butter. Set aside.
- In a food processor, add the vanilla wafer cookies and blend on high speed until the cookie are very fine crumbs. Gradually pour the melted butter in while the food processor runs on low speed, and continue blending until the crumbs start to pull away from the edges of the food processor bowl.
- Pour the crumb mixture into the pie dish and press firmly into the bottom and up the sides. Place it in the freezer for 20 minutes.
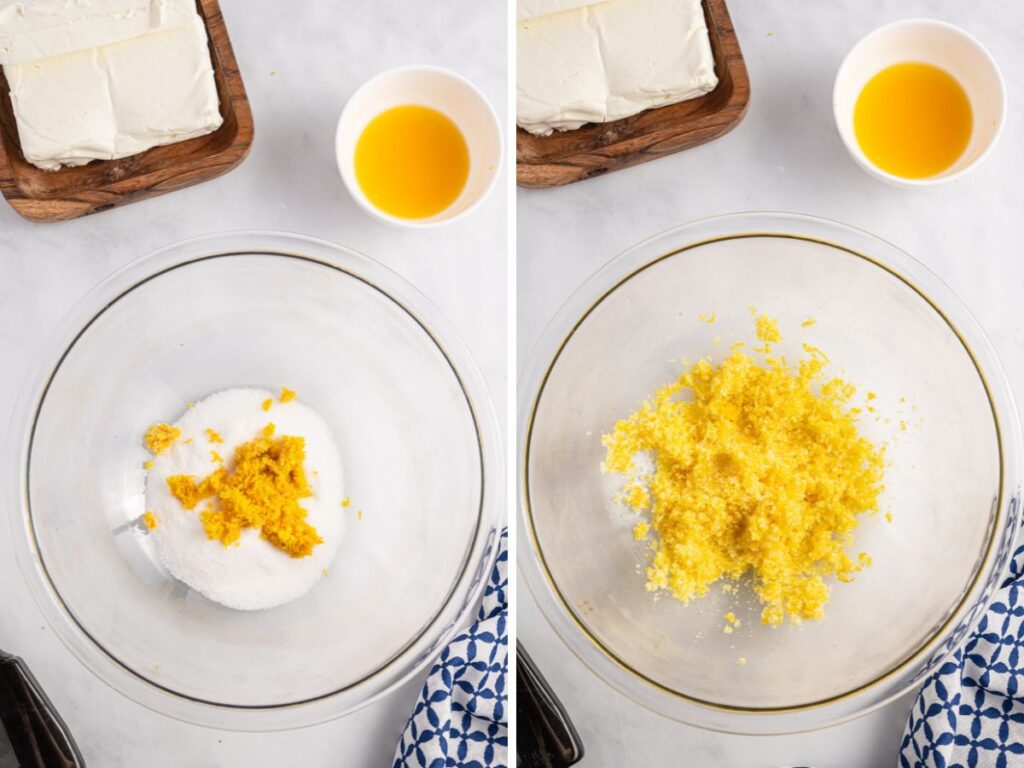
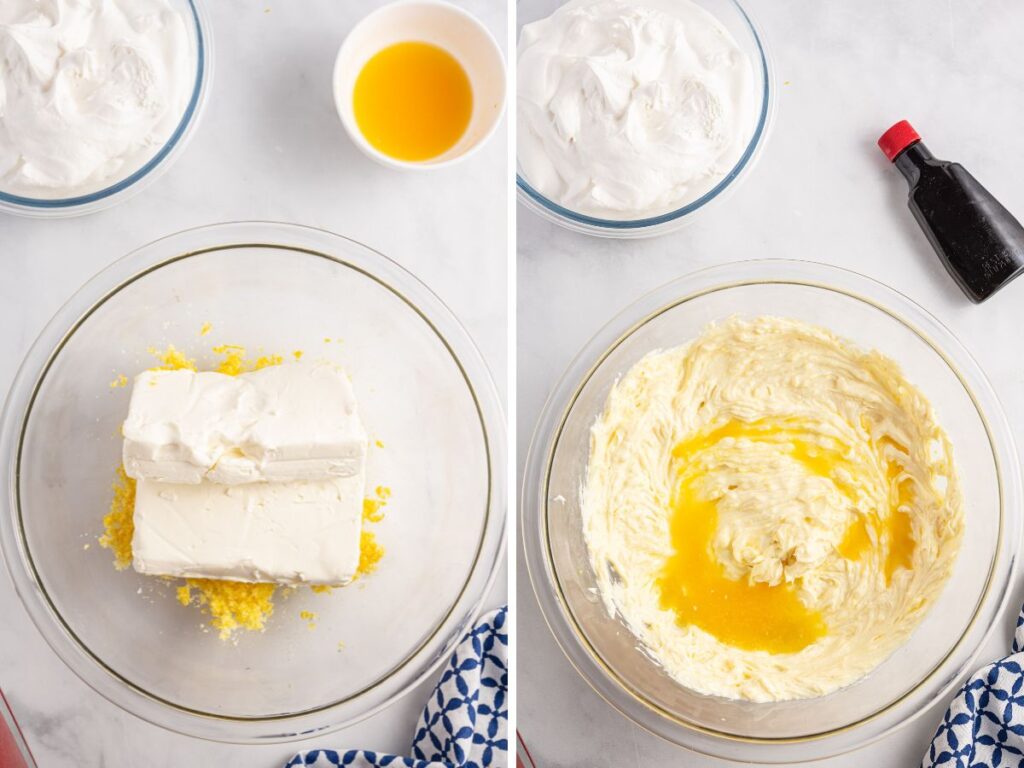
- Make the orange pie filling. In a large bowl, add the orange zest and sugar. Massage it together with your fingers until very fragrant and combined. It will look like orange sugar.
- Add the cream cheese and beat with an electric hand mixer until the cream cheese is very smooth and creamy. Pour in the freshly squeezed orange juice and orange extract, and continue beating until combined.
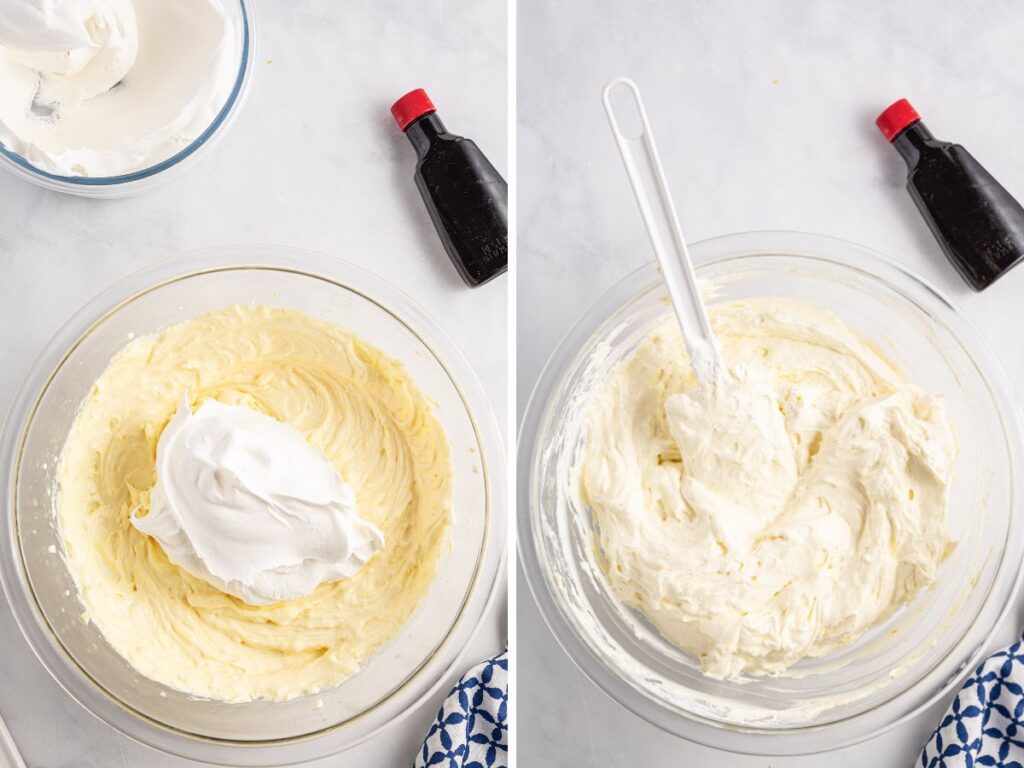
- Stir in the whipped cream with a spatula and mix until everything is well combined. Scrape the bottom of the bowl to make sure everything is mixed in well and not stuck on the bottom).
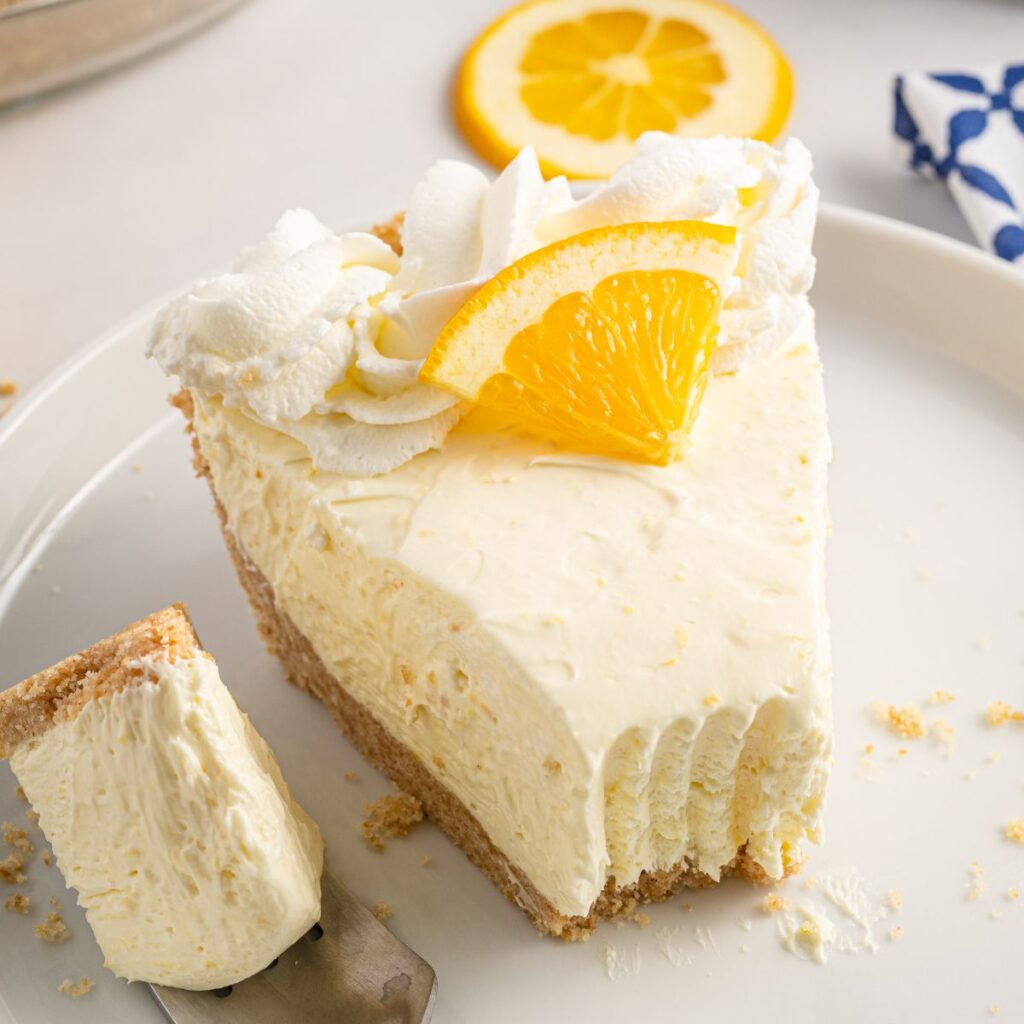
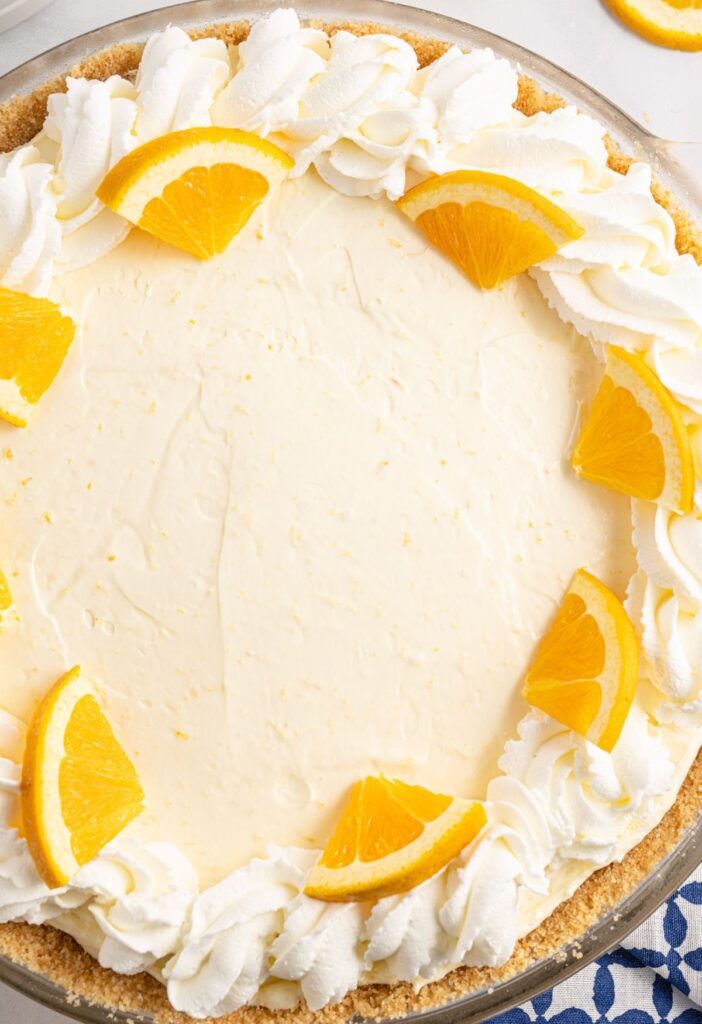
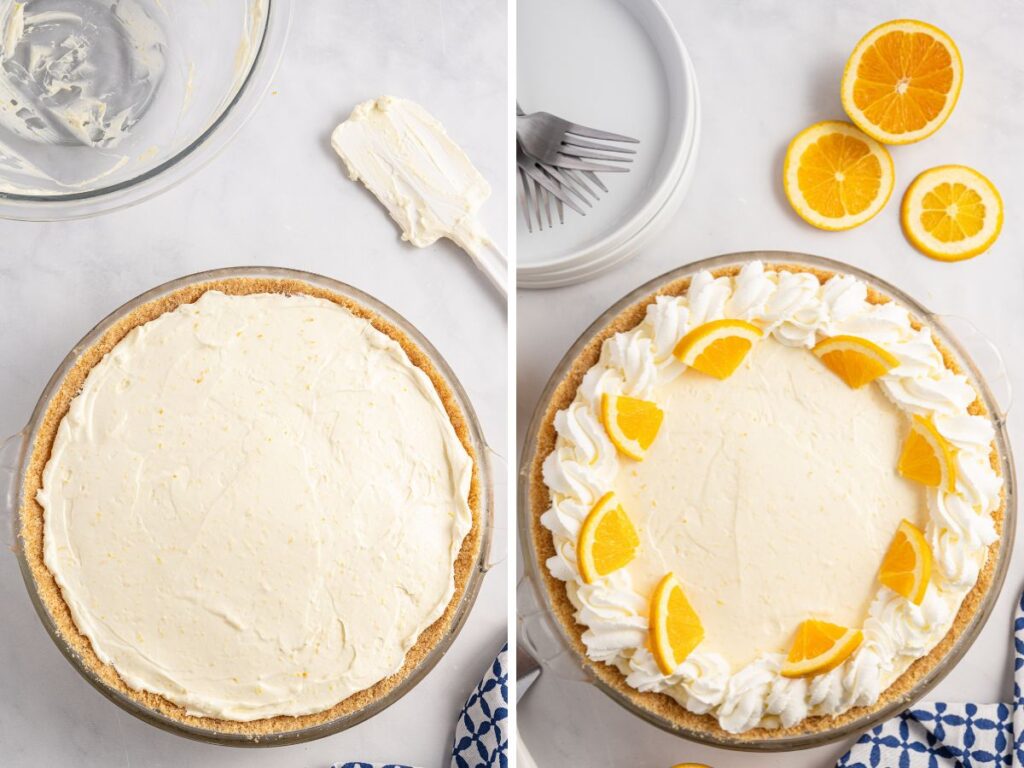
- Spoon the filling into the pie crust and smooth out the top.
- Cover the pie plate with a lid or plastic wrap, and refrigerate for at least 6-8 hours, or overnight is best.
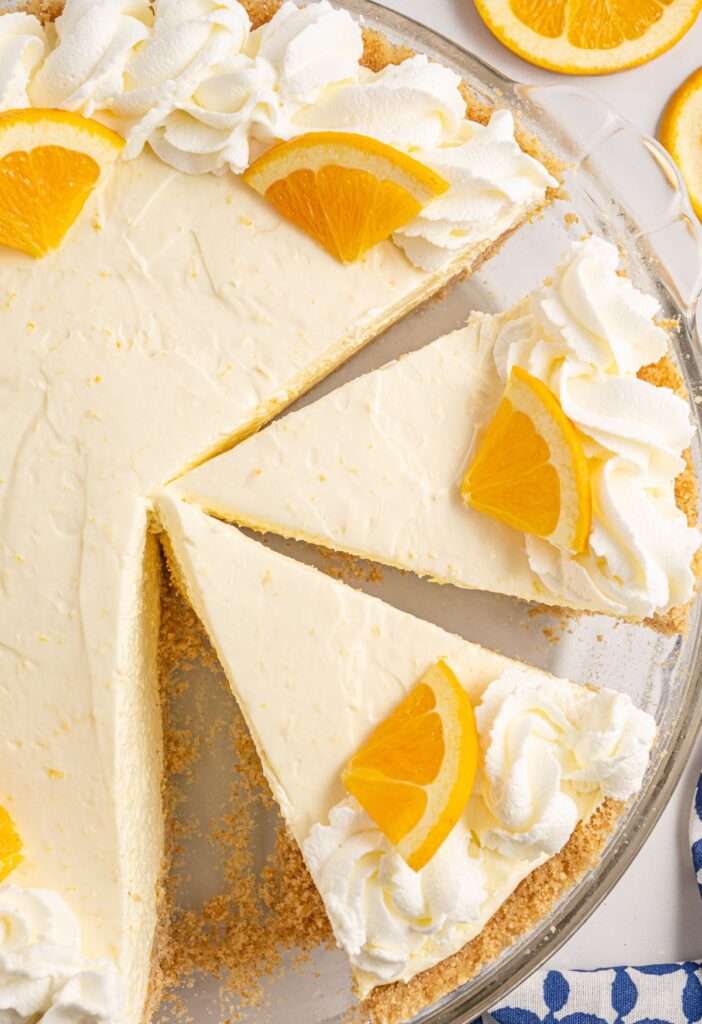
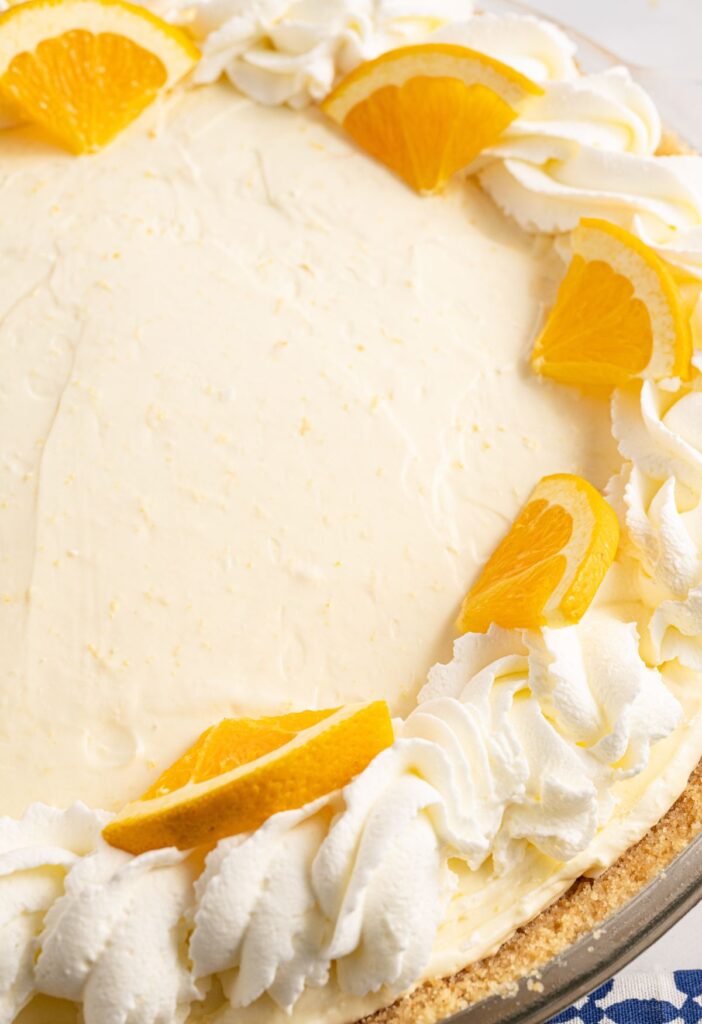
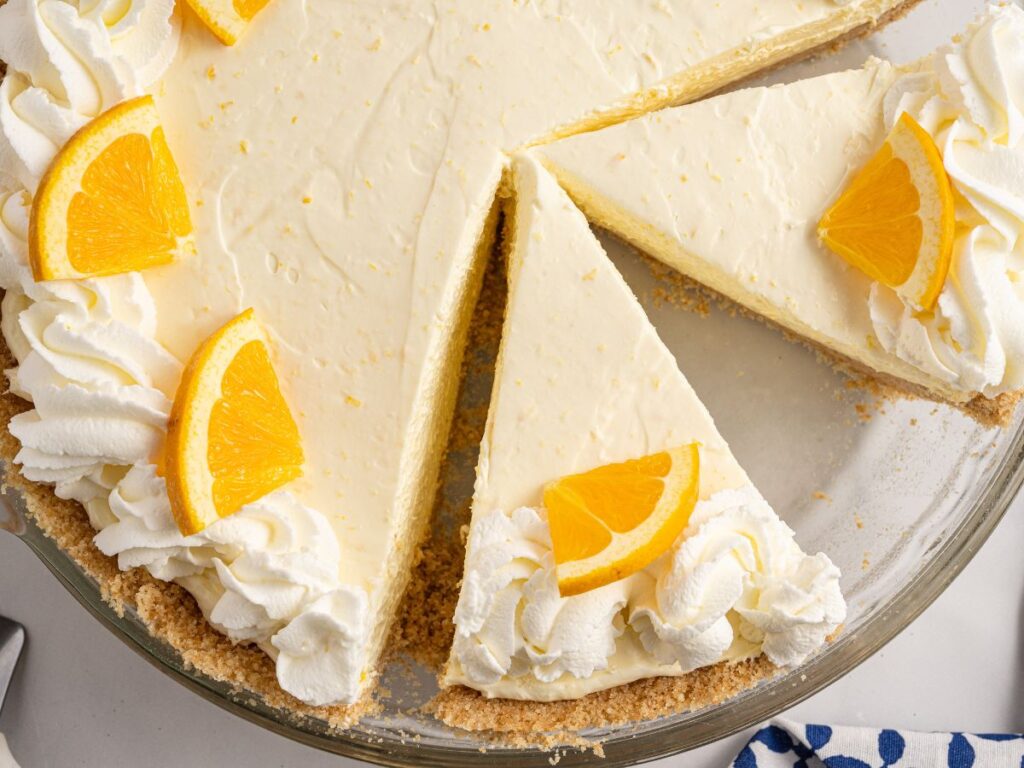
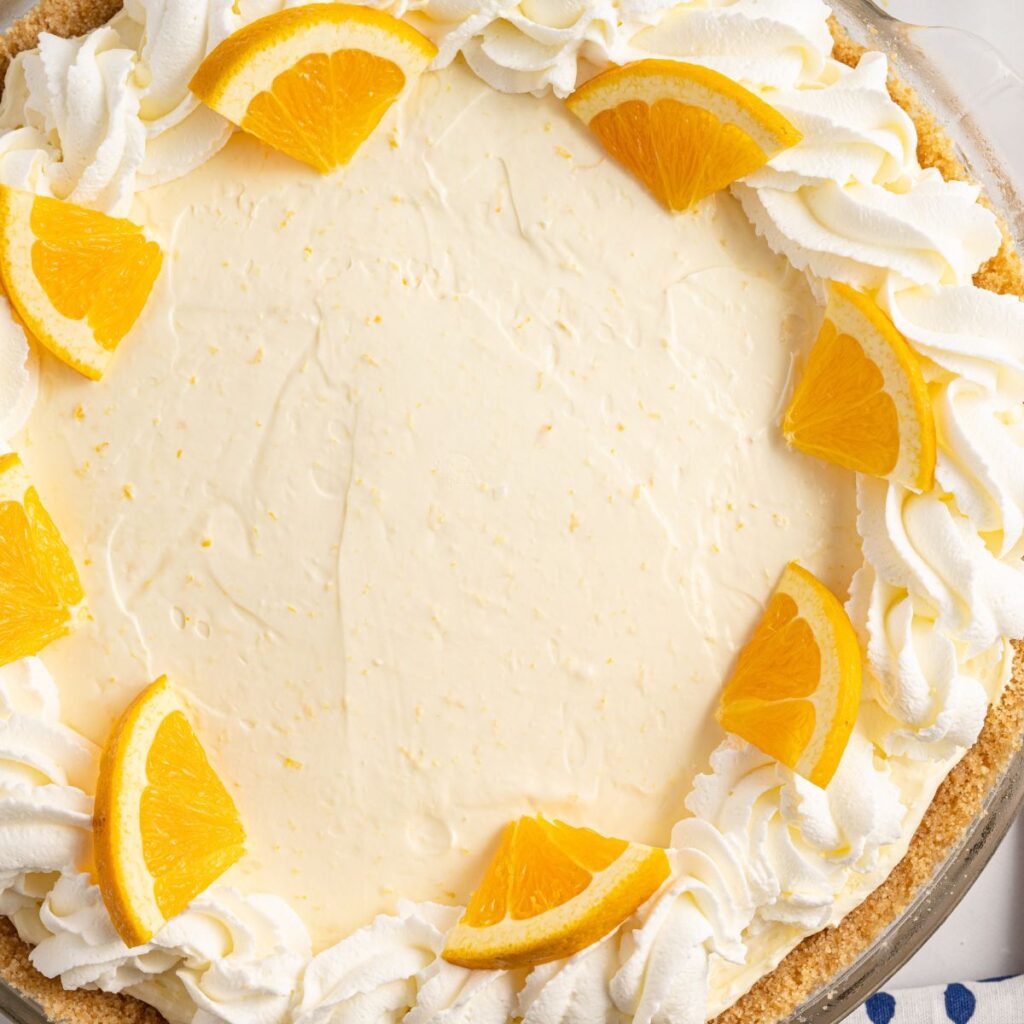
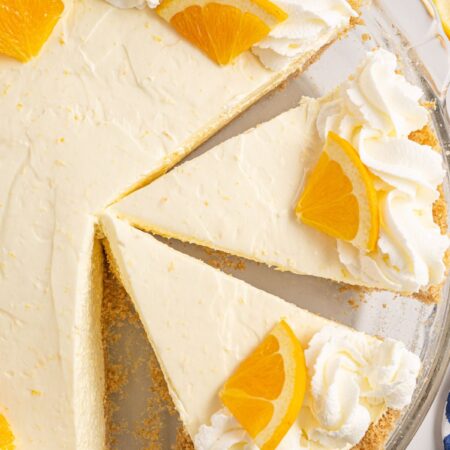
- When ready to serve, top with whipped cream and orange slices (optional).

For a very simple prep, try using a prepared 9-inch graham cracker crumb crust. They also sell a shortbread ready-to-use crust that is fabulous in this recipe as well.
FAQ’s + Expert Tips
- A good-quality, sturdy citrus zester is a must! I love this OXO Citrus Zester because it comes with a handy cover for storing (no accidentally cutting yourself when rummaging through the utensil drawer) and it’s very sharp which makes it so easy to zest the citrus fruits.
- Along with a zester, an easy citrus juicer is a must as well. My favorite one is this OXO Citrus Juicer which comes with a measuring cup built-in.
- Storage Instructions : This pie will keep well in the fridge for up to 7 days. It actually tastes better and better the longer it’s in the fridge. So leftovers are delish! The crust does start to get much softer, so I don’t recommend refrigerating it for several days before serving, but the leftovers are fabulous for that long in the fridge.
- Crust : I prefer Nilla wafers in the crust cause they’re not too sweet and they crumble really finely. Graham crackers are another great choice, or honey teddy grahams. You can use crushed Oreo cookies but they are much sweeter! I would try adding a pinch of salt to the crust ingredients to help offset some of that sweetness. You can also go the super easy prep way and buy a ready-to-use graham cracker crust at the store. Make sure it’s the 6 oz sized one and not the 2-extra servings one. The 2 extra servings pie crust will work, but the pie will be thinner.
- Cream Cheese Tip : Use the full-fat cream cheese, instead of reduced-fat, for the best flavor and rich creamy texture. It makes a difference! However, if needed, the reduced fat cream cheese will work in the recipe. To help the cream cheese mix in smoothly make sure that it is well softened. Leave it out at room temperature no longer than 2 hours prior to using it.
- I use this Glass Pie Plate with a Lid and it’s really convenient, especially for refrigeration because it already has a lid. No need to mess with plastic wrap!

Orange Creamsicle Pie
Equipment
Ingredients
Nilla Wafer Crust
- 3 cups Nilla wafer cookies
- 5 tablespoons butter melted
Orange Creamsicle Filling
- 1/2 cup granulated sugar
- 2 tablespoons orange zest (about 1 orange)
- 2 bars (8 oz each) cream cheese softened
- 2 tablespoons freshly squeezed orange juice (about 1/2 an orange)
- 2 teaspoons orange extract
- 8 ounces Cool Whip thawed
Optional Garnishes
- whipped cream (homemade or store-bought)
- orange slices
- whole or crushed Nilla wafer cookies
Instructions
Make The Nilla Wafer Crust
- Grease a 9-inch pie plate with shortening or butter. * You can also use a 6 oz prepared ready-to-use graham cracker crust from the store if wanted. For a not as thick and high pie, use the 2-extra serving size crust.
- In a food processor, add the Nilla wafer cookies and blend at high speed unto the cookies are in very fine crumbs. * If you don't have a food processor you can use a food chopper or place the cookies inside a Ziploc bag and use something heavy like a rolling pin or meat pounder to crush them very finely. * Measure out 3 cups of the Nilla wafer cookies from the box and crush those to fine crumbs. We want the 3 cups measured before they're crushed not after.3 cups Nilla wafer cookies
- Gradually pour in the melted butter while the food processor runs on low speed, and continue blending until all the crumbs are coated and start to pull away from the edges of the food processor.* Again, if you are not using a food processor combine the finely crushed cookies and melted butter into a mixing bowl. Mix until combined well.5 tablespoons butter
- Firmly press the crust mixture into the prepared 9-inch pie plate and press onto the bottom and up the sides. Place it in the freezer for 20 minutes.
Make The Orange Creamsicle Filling
- In a large mixing bowl add the granulated sugar and orange zest. Use your clean fingers to 'massage' the zest and sugar together until combined and very fragrant. It should look like orange sugar when done properly.1/2 cup granulated sugar, 2 tablespoons orange zest
- Add in the cream cheese and beat with an electric hand mixer until the cream cheese is smooth and combined.2 bars (8 oz each) cream cheese
- Pour in the freshly squeezed orange juice and orange extract. Beat until combined.2 tablespoons freshly squeezed orange juice, 2 teaspoons orange extract
- Stir in the Cool Whip with a mixing spoon or spatula and stir gently just until incorporated. Scrape the bottom and sides of the bowl several times to ensure that it's really well-mixed and that nothing is left there.8 ounces Cool Whip
- Spoon the filling into the Nilla wafer crust and smooth out the top.
- Cover the pie dish with a lid or plastic wrap and place it in the refrigerator for at least 8 hours, or overnight is better.
- When ready to serve, garnish the pie with whipped cream, orange slices, and/or whole or crushed Nilla wafer cookies. Enjoy!
Notes
Nutrition
Did You Make This Recipe?
I’d love to see it! You can share it with me on @happy.familyrecipes and follow on Pinterest @happyfamilyrecipes or Facebook @happyfamilyrecipes for more!
Did you love this recipe?
Make sure to comment below so we can chat about it! Or follow on your favorite social network for even more family recipes.