
Some of the links below are affiliate links. This means that, at zero cost to you, I will earn an affiliate commission if you click through the link and finalize a purchase.
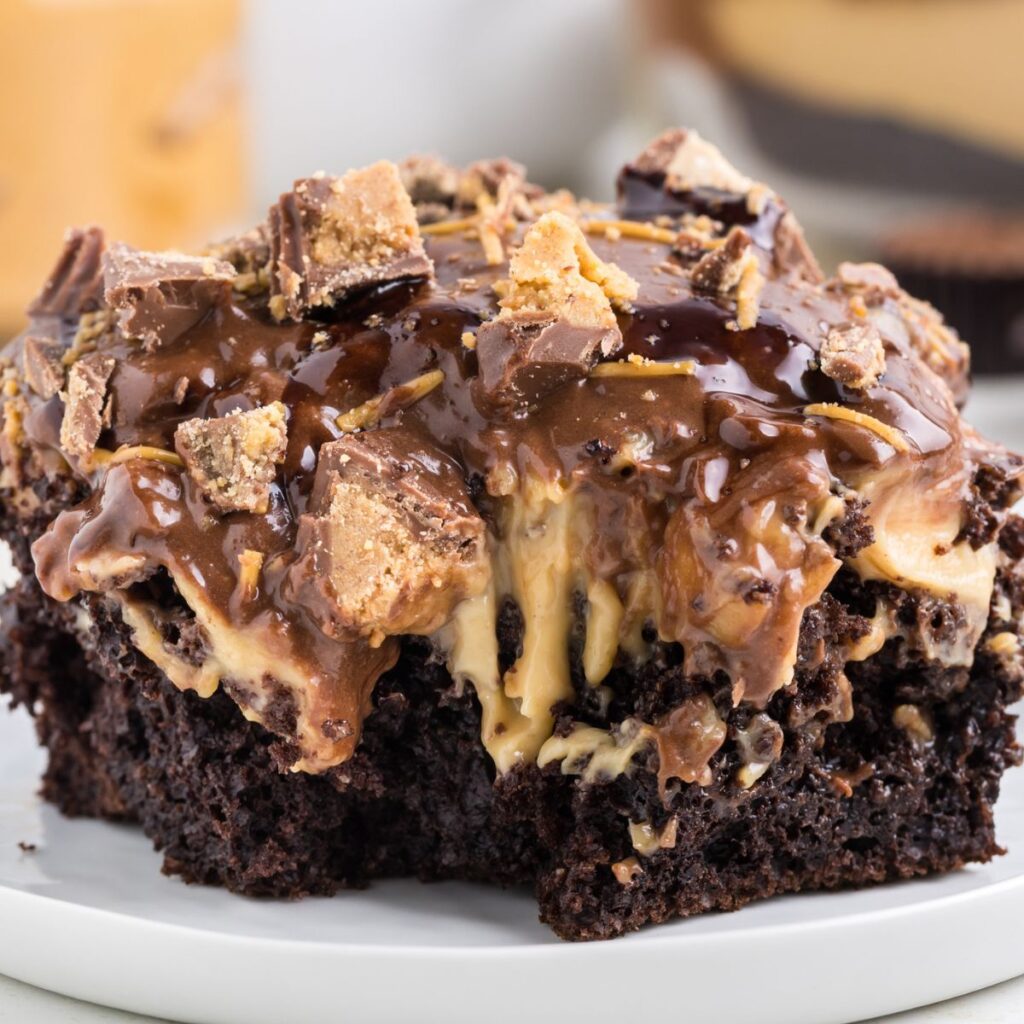
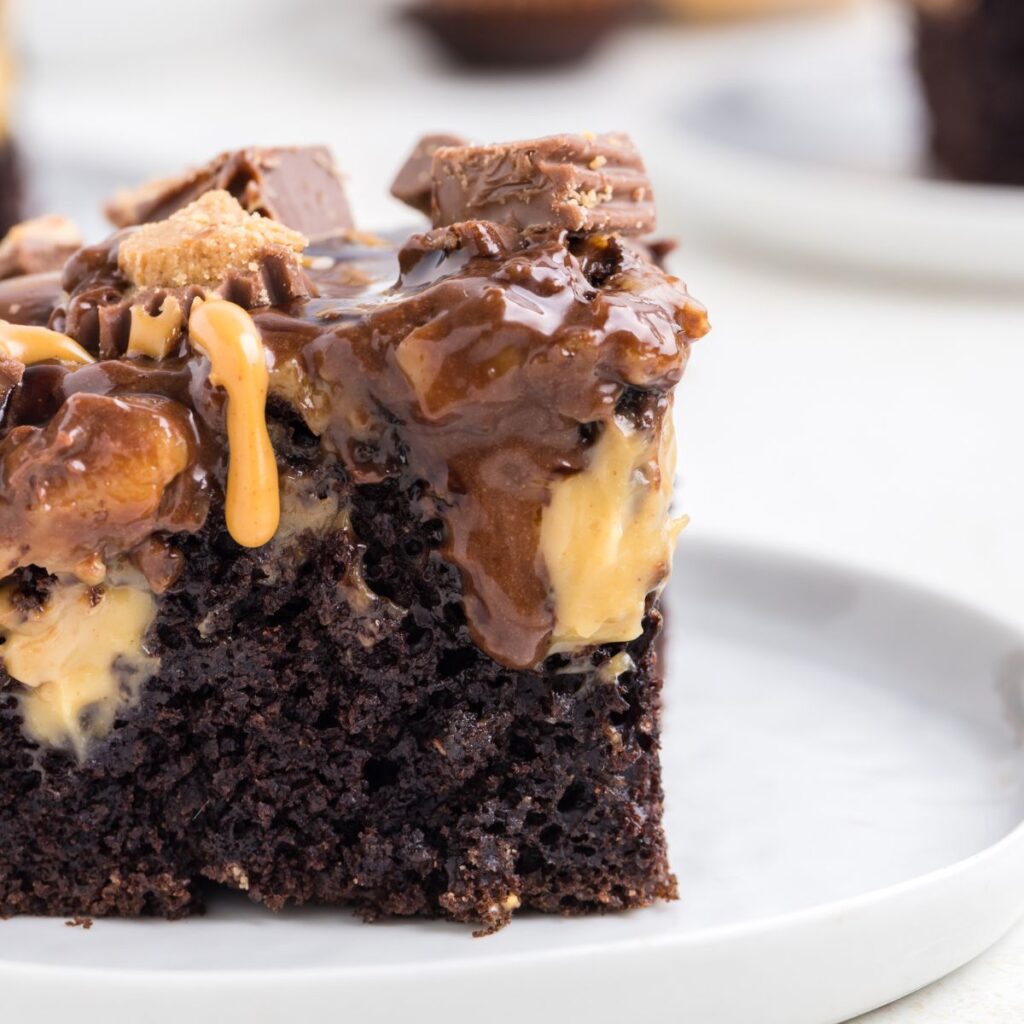
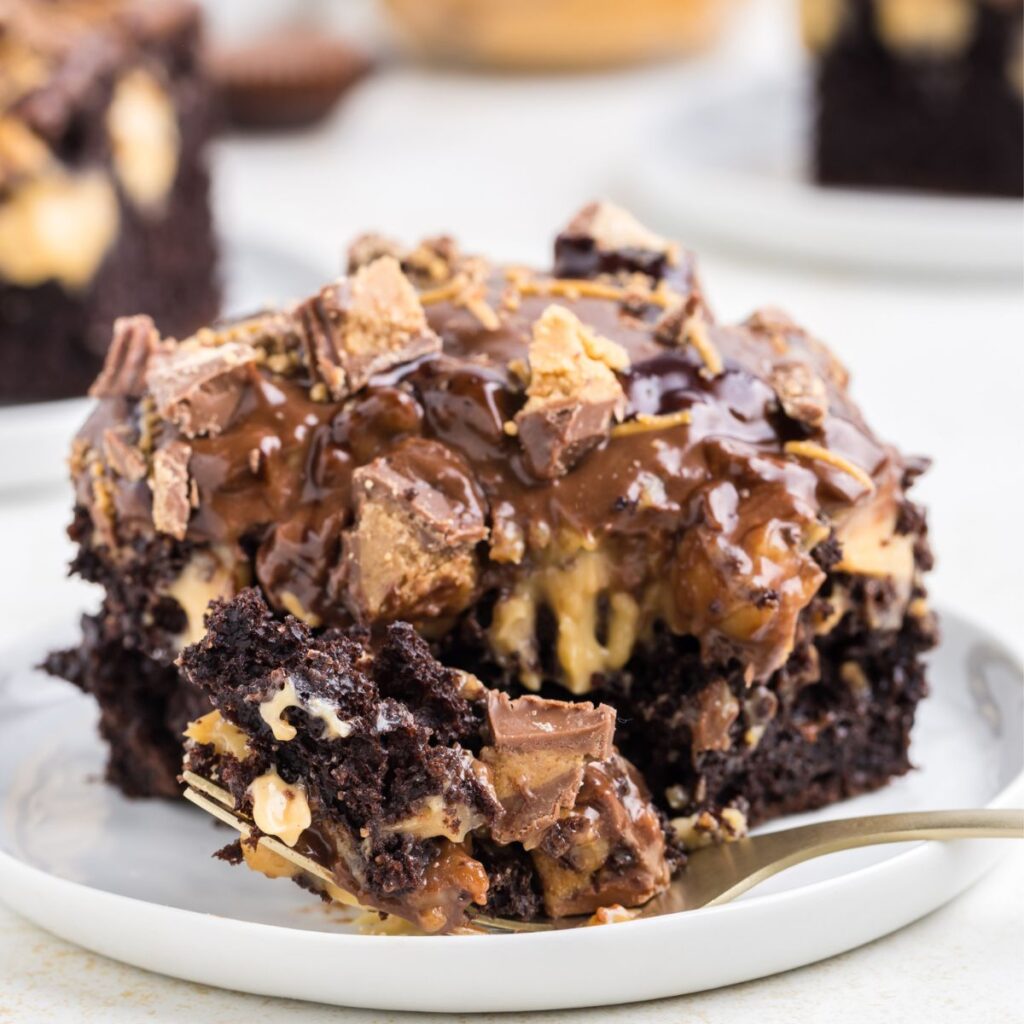
Reese’s Poke Cake is the ultimate easy cake recipe for all the peanut butter + chocolate dessert lovers! Simple to make with a chocolate cake mix, a fluffy peanut butter pudding mixture and chocolate frosting.
Easy Reese’s Poke Cake Recipe (Cake Mix Dessert)
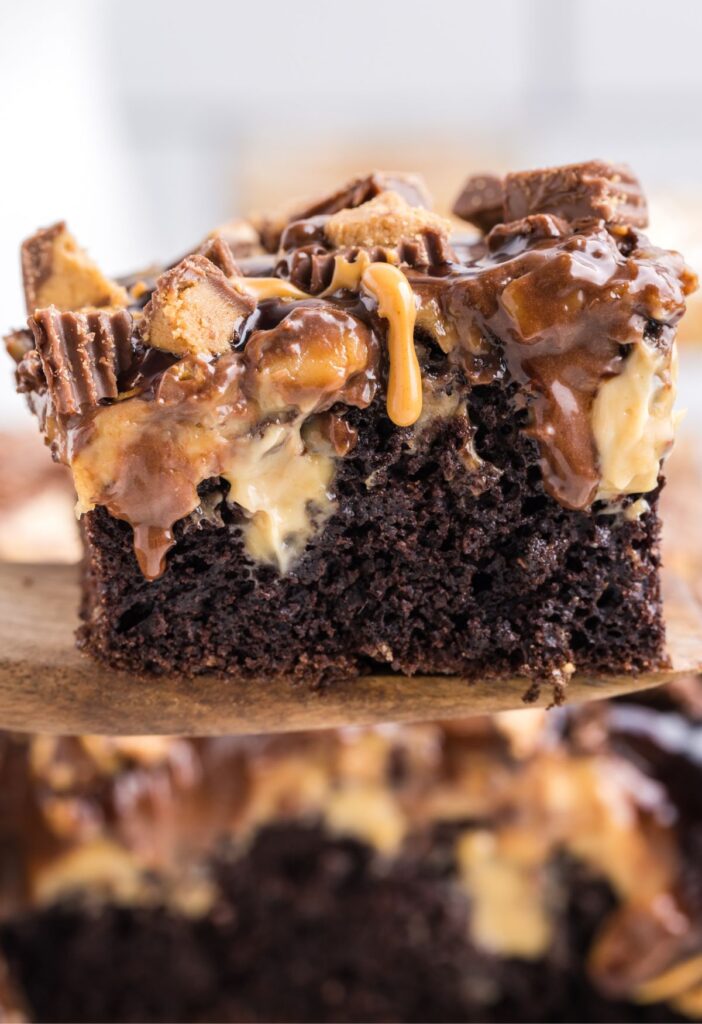
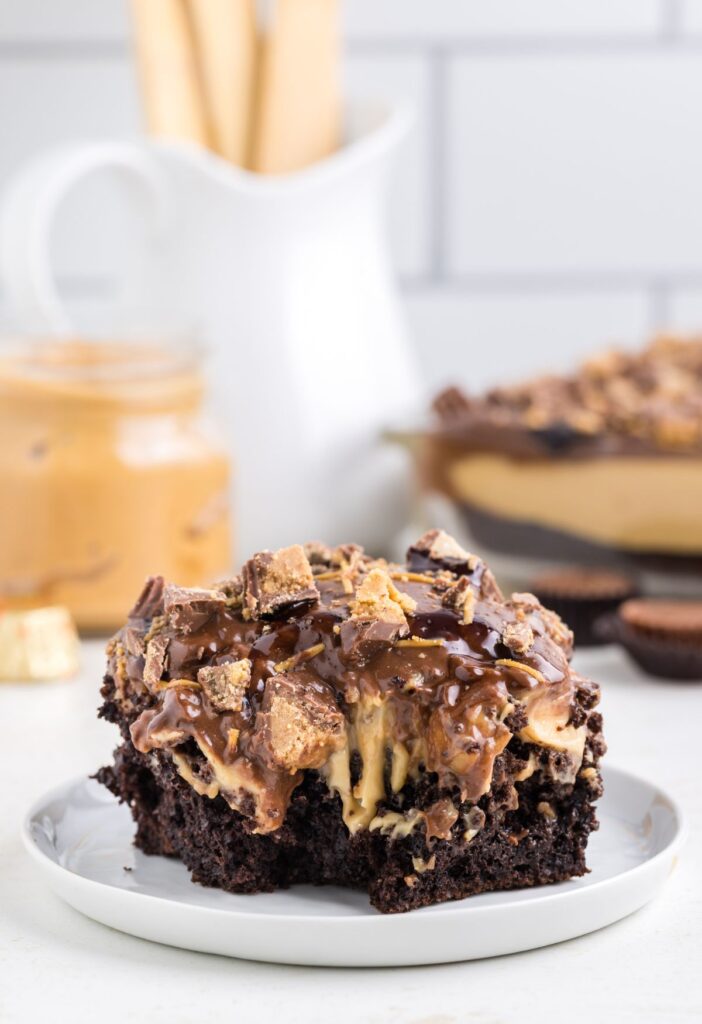
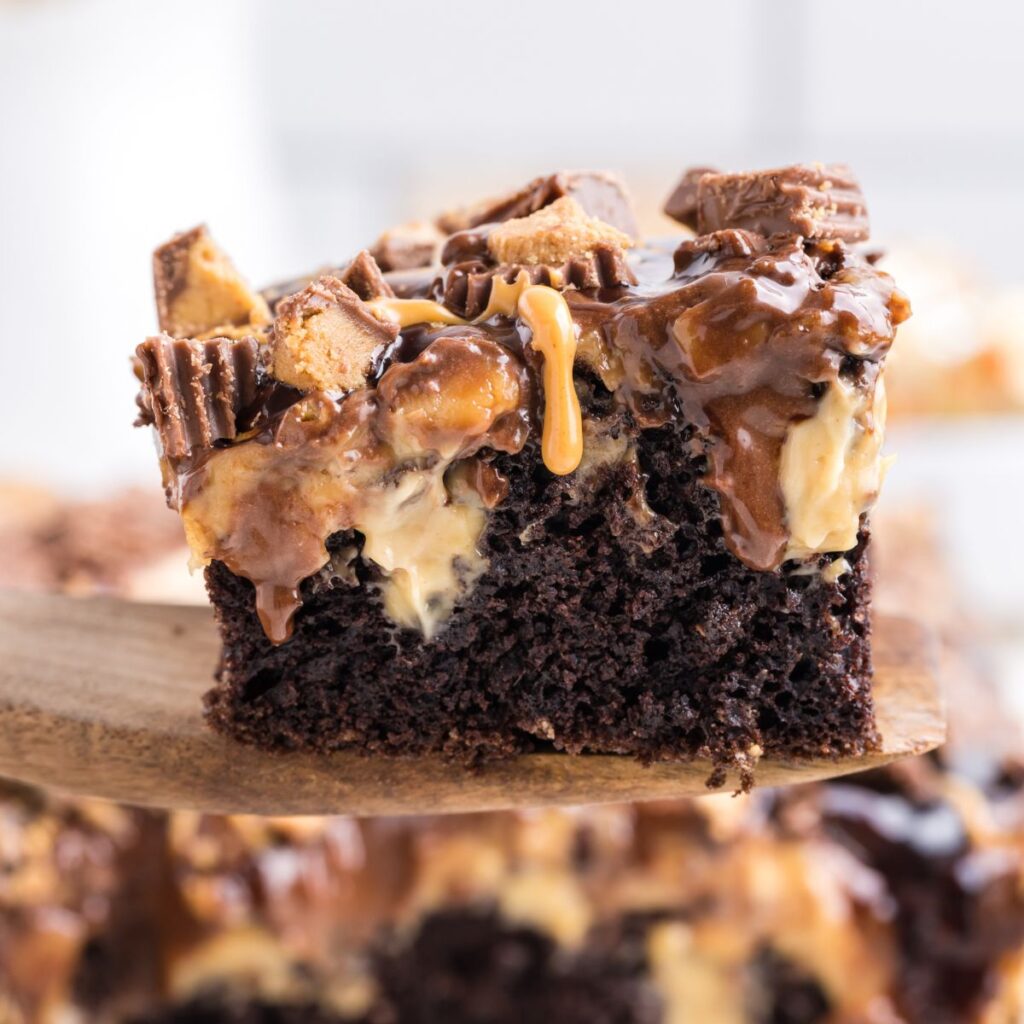
This easy-to-make Reese’s Poke Cake is a peanut butter & chocolate lover’s dream! Chocolate cake mix ‘poked’ with holes, and then filled with a creamy and fluffy peanut butter pudding mixture, and topped with chocolate frosting and chopped Reese’s Peanut Butter Cups.
Basically, all the good stuff in life stuffed in an easy 9×13 cake pan. For more easy desserts be sure and also try this No Bake Strawberry Pretzel Pie or this Mini Funfetti Cheesecake.
Why You’ll Love It
- Easy Cake Mix Dessert – I love making homemade desserts but sometimes you just need something quick and simple, that will feed a crowd. This peanut butter chocolate poke cake is just that. Uses a cake mix + chocolate frosting, and other prepared ingredients to make it quick.
- Peanut Butter + Chocolate Explosion – Need I say more?! If you love this classic flavor combo then this cake is a guaranteed hit.
- Adaptable – Use a gluten-free cake mix, use a sugar-free cake mix, or try using a different flavor of cake mix to switch it up. You can also use crunchy peanut butter and/or top the cake with whatever you want – peanut butter chips, Reese’s pieces, peanuts, etc.
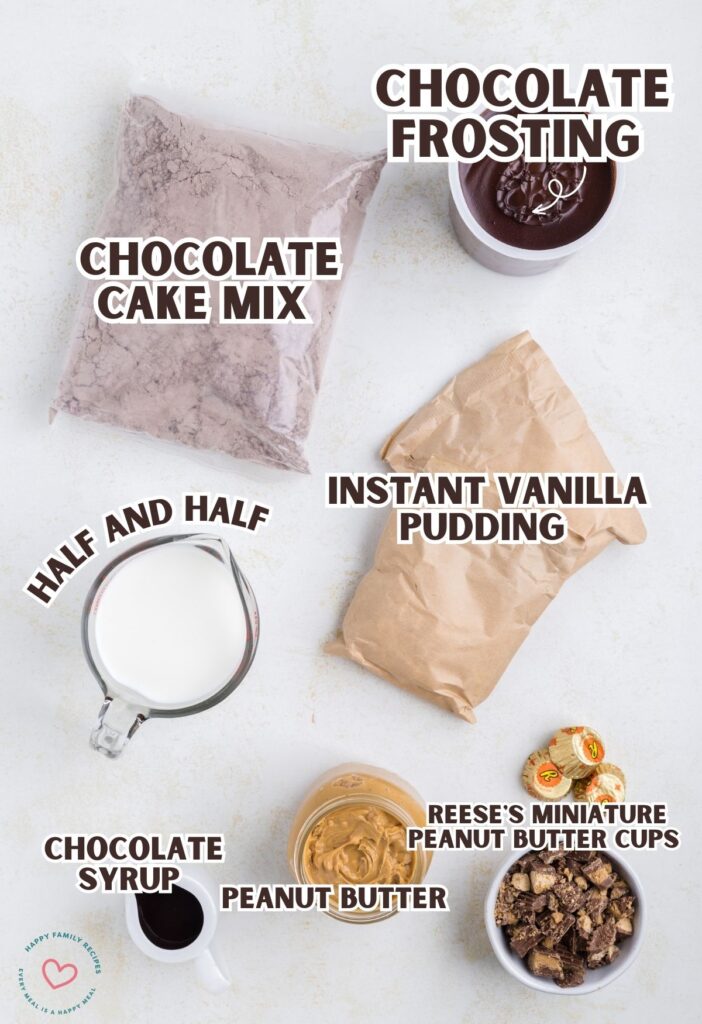
Ingredients Needed
- Chocolate Cake Mix + Ingredients Needed to Make It : Use your favorite chocolate cake mix and follow the directions on the back of the box. You can also make a ‘doctored up’ cake mix recipe in place of following the directions on the back of the box.
- Instant Vanilla Pudding – Two small boxes. Do not follow the directions on the box, but rather follow the recipe card below.
- Half and Half – I prefer using a higher fat milk which will help the pudding thicken really nicely and help it set. Whole milk can be used but I would not use anything lower in fat than whole milk.
- Creamy Peanut Butter
- Chocolate Frosting – Make it easy and use a store bought can of frosting. You can also make your own, you will need about 2 cups of chocolate frosting.
- Chocolate Syrup/Sauce – This is an optional drizzle for the top of the cake. Hershey’s chocolate syrup is what I use.
- Reese’s Miniature Peanut Butter Cups – I use the ones that are individually wrapped in the gold foil. Any type can be used, regular size, mini, Reese’s Pieces, etc. Just make sure that they are roughly chopped.
How To Make This Easy Poke Cake Dessert
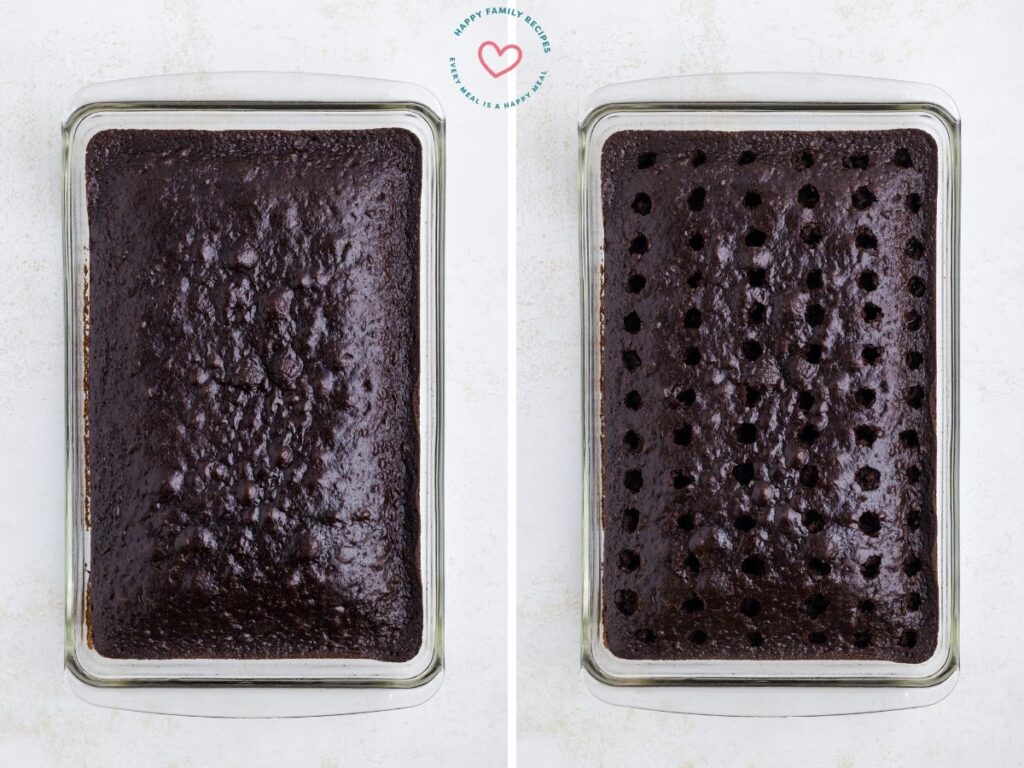
- Prepare the cake according to package directions. Once done, allow the cake to cool completely before proceeding.
- Once the cake is cooled use the end of a wooden spoon to poke holes into the cake. Poke lots of holes, about 1-inch apart, all over the top of the cake. It’s important to use the end of a wooden spoon so the holes are larger to hold the thick pudding mixture.
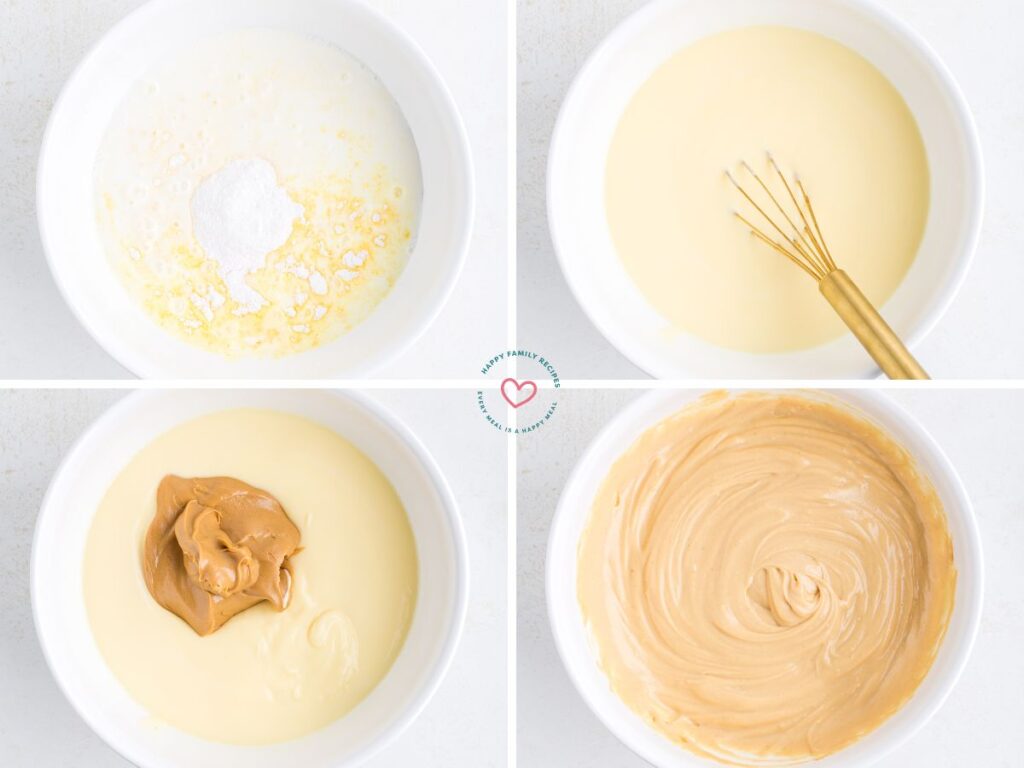
- Whisk together the instant pudding mix + half and half until very thickened and combined. Add the creamy peanut butter and stir to combine.
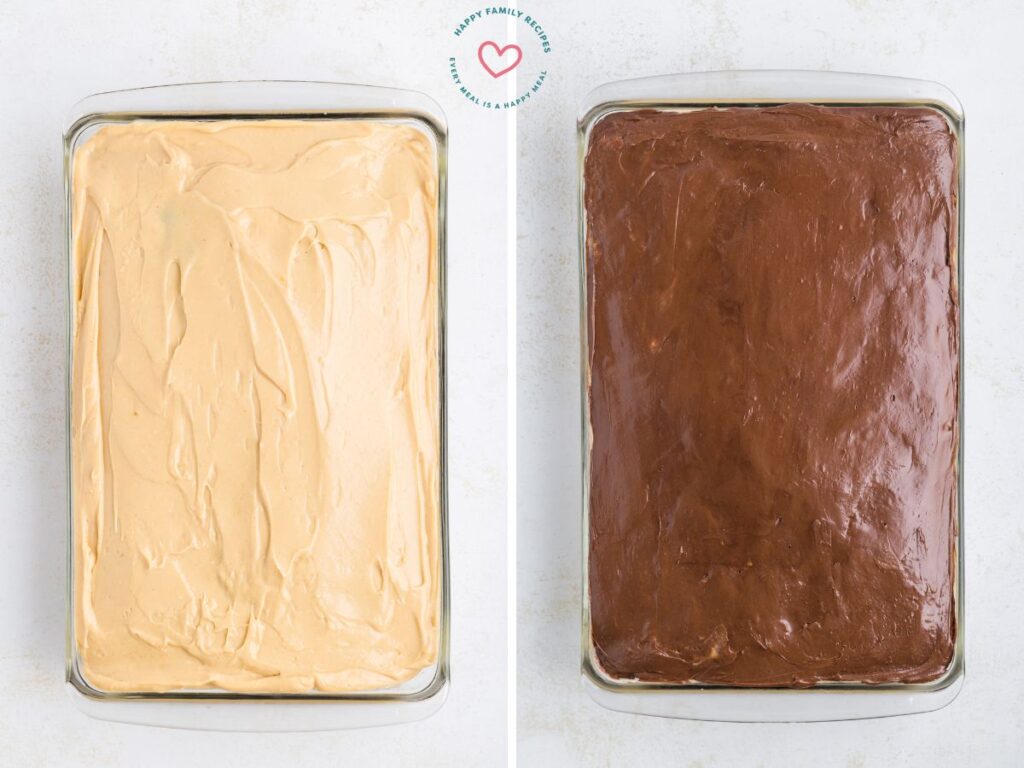
- Spread the peanut butter pudding over the cake making sure to get all the holes filled with it.
- Cover the cake pan with plastic wrap and let it refrigerate for at least 4 hours.
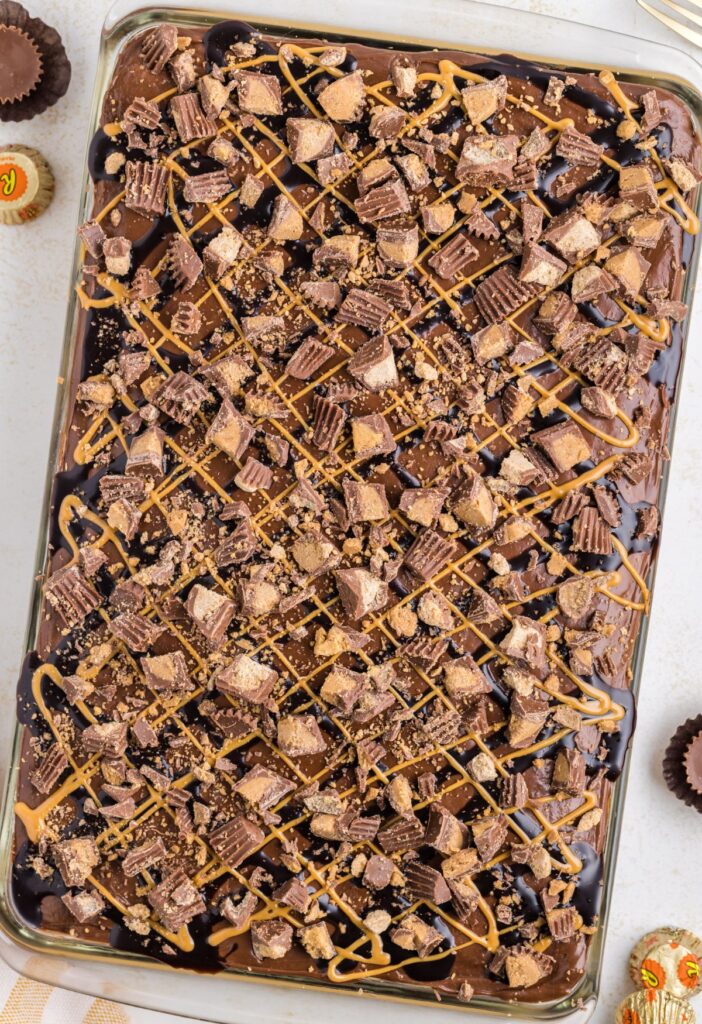
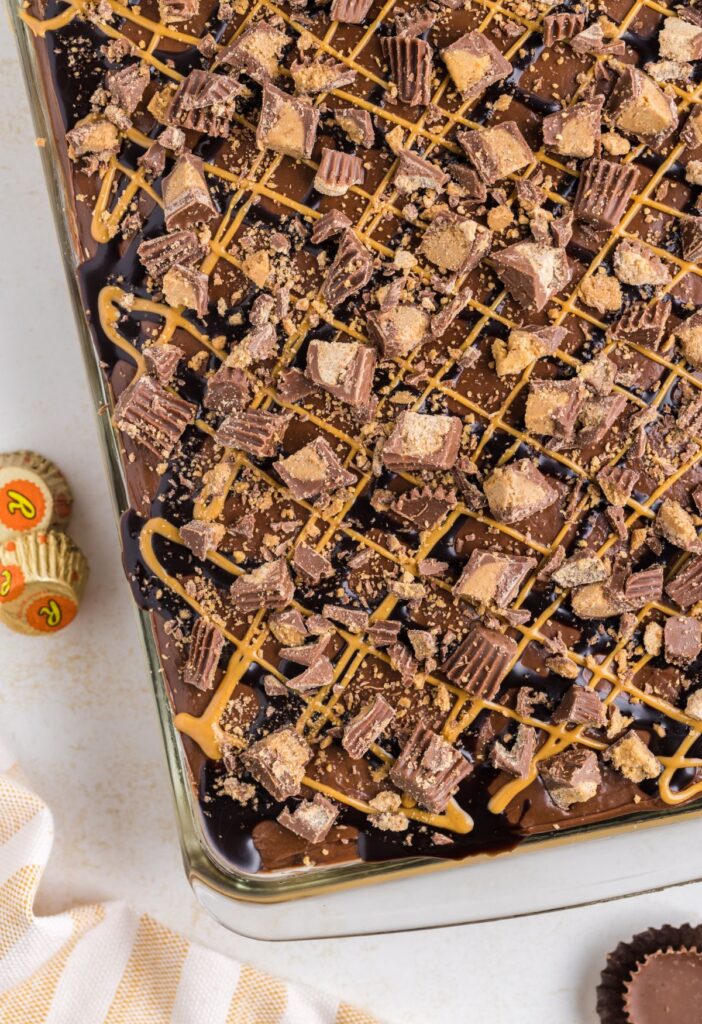
- When you’re ready to serve, frost the cake with the chocolate frosting, drizzle the peanut butter and chocolate syrup over top, and then garnish with chopped miniature Reese’s peanut butter cups.

FAQ’s + Tips For Success
- Poke Hole Tips : Because the pudding peanut butter mixture is thick, we want to make sure the holes are larger in order to hold the mixture. Use the end of a wooden spoon. Not a skewer or fork prongs, but rather the end of some sort of serving spoon that has a thicker diameter to it. Poke the holes 1-inch apart from each other all over the top of the cake.
- Frosting Tip : I have found that it’s easiest to spread canned frosting if it has first been warmed up so it’s softer and more easily spreadable. I put the chocolate frosting can in the microwave (I will warn that the directions from the company say to move the frosting to a microwave-safe bowl, although I’ve never done that) for 30 seconds in order to warm it up. You can almost just pour it over top and then gently spread it out so it doesn’t mess up the pudding layer below it.
- Garnish Drizzle : You can omit these entirely or just use the chocolate drizzle or just the peanut butter drizzle. If you don’t want to buy chocolate syrup for only 1/4 cup (I don’t!) then just don’t use it. I normally just use the melted peanut butter because I always have peanut butter in my pantry.
- Crunchy Peanut Butter : If you prefer the texture and crunch then use crunchy peanut butter. It works great in this recipe as a substitute for creamy peanut butter. Especially for the drizzle on top it’s really yummy.
- Fridge Time : The longer the cake sits in the fridge (once topped with the peanut butter pudding) the more moist and soft the cake will become. You need at least 4 hours but you can also leave it in the fridge for up to overnight (or up to 18 hours).
- Make It Ahead of Time : Because you prepare the cake mix and need to let it cool, you can make the cake the day before and let it sit, covered, at room temperature overnight. Prepare the pudding mixture in the morning and let the cake sit in the fridge all day. Then frost and garish it that night. You can also leave the assembled, ready to serve cake, in the fridge for up to 8 hours.
Store leftovers in the fridge for up to 3-4 days. Cover the cake pan with a lid or plastic wrap.
This Reese’s Poke Cake is a very rich and decadent cake. I always suggest cutting it into smaller pieces to avoid sugar comas 😉


Reese’s Poke Cake
Ingredients
Reese's Poke Cake
- 1 box (15.25 oz) chocolate cake mix (plus ingredients needed to make it)
- 3½ cups half and half
- 2 boxes (3.4 oz each) instant vanilla pudding mix
- 1 cup creamy peanut butter
Toppings & Garnish
- 1 container (16 oz) chocolate frosting
- 1/4 cup chocolate sauce
- 1/4 cup creamy peanut butter
- 20 Reese's miniature peanut butter cups (roughly chopped)
Instructions
- Prepare the chocolate cake mix according to the package directions. When done, allow the cake to cool completely.1 box (15.25 oz) chocolate cake mix
- Once the cake is cooled to room temperature, use the end of a wooden spoon (something with a larger diameter to it, not a skewer or fork) to poke holes 1-inch apart all over the top of the cake.
- Combine the half & half and instant vanilla pudding mix in a mixing bowl. Whisk for 1-2 minutes or until thick and combined.3½ cups half and half, 2 boxes (3.4 oz each) instant vanilla pudding mix
- Add the creamy peanut butter into the pudding and stir with a silicone spatula or wooden spoon.1 cup creamy peanut butter
- Pour the pudding mixture over top of the cake and make sure that all the holes are filled with the pudding. Use a spoon if needed to fill all the holes. Cover the cake pan with a lid or plastic wrap and refrigerate for at least 4 hours.
- When ready to serve, spread the chocolate frosting over top the pudding layer and then drizzle the chocolate sauce over top. * It's much easier to spread the canned frosting after it has been warmed in the microwave for about 30-40 seconds.1 container (16 oz) chocolate frosting, 1/4 cup chocolate sauce
- Microwave the peanut butter, in a microwave-safe dish, for 30 seconds. Drizzle it over the cake. Garnish the top with the pieces of Reese's peanut butter cups.1/4 cup creamy peanut butter, 20 Reese's miniature peanut butter cups
Notes
Nutrition
Did You Make This Recipe?
I’d love to see it! You can share it with me on @happy.familyrecipes and follow on Pinterest @happyfamilyrecipes or Facebook @happyfamilyrecipes for more!
Did you love this recipe?
Make sure to comment below so we can chat about it! Or follow on your favorite social network for even more family recipes.